Digital Fabrication
What is Digital Fabrication?
Digital fabrication involves creating a design in CAD (computer a design) or CAM (computer ) software. Once 3D design is created, it can be printed out or transferred onto tangible materials.
Three main ways to create digital fabrications
FDM 3D Printing
prints the design by adding layers of material in the design shape (additive method)
Laser Printing
cut or engrave your design into a material like wood, plexiglass or metal (subtractive method)
uses a laser to heat the material and cut in the shape of the design
CNC Mills Cutting
spins a cutting tool in X, Y, and Z directions
Cuts 2D or 3D designs
Classroom Application
Digital fabrication is a growing area in the art field and in art education. Depending on access to the technology and materials, there are potential lessons from upper elementary students through to high school students.
Digital fabrication teaches dimensional thinking and planning. It also teaches students to think about how things in the world around them are made.
I would make lessons around digital fabrication a unit/ several lessons in a row so students could become familiar with the software, then begin to create original and more complex designs. The basic lessons on Tinkercad are a great tool for that. If I were using a different CAD software, I would start with basic demonstrations and lessons as well.
Once students practice creating simple designs and learn the software, one lesson prompt is having students design and create a new invention, using at least five shapes. I would have them begin by sketching out ideas, choosing one, then organizing it in 2D before working in the software.
I included the specificity of five shapes so students go complex, but still have the opportunity for an open ended final product.
Digital fabrication most obviously integrates art with engineering and geometry because students are able to design and create new inventions or objects using three dimensional shapes and principles involving those shapes.
It also gives students the opportunity to work with social studies and science by allowing them to create things related to those fields as reflections, close observations or in learning to understand how they work.
Tinkercad
Free, easy to use software that provides a place to create 3D Printable Designs. Ideal for beginners in digital fabrication.
Basic Tutorials
Tinkercad offers several short basic lessons to guide users through the process of creating simple designs and familiarize them with the software tools. Above are three images of the final product from three separate completed lessons. Each lesson teaches different ways to use the tools and create a final product, as the examples outlined below.

Six sided die, Final 3-D View

Basic Ring, final work plane view

Chess Pawn, final work plane view
Six sided die
use of work planes
adding shapes to surfaces.
Basic Ring
putting a hole in shapes
Chess Pawn
compilation of several shapes into one
grouping objects

Project One
Roman Dome with Columns
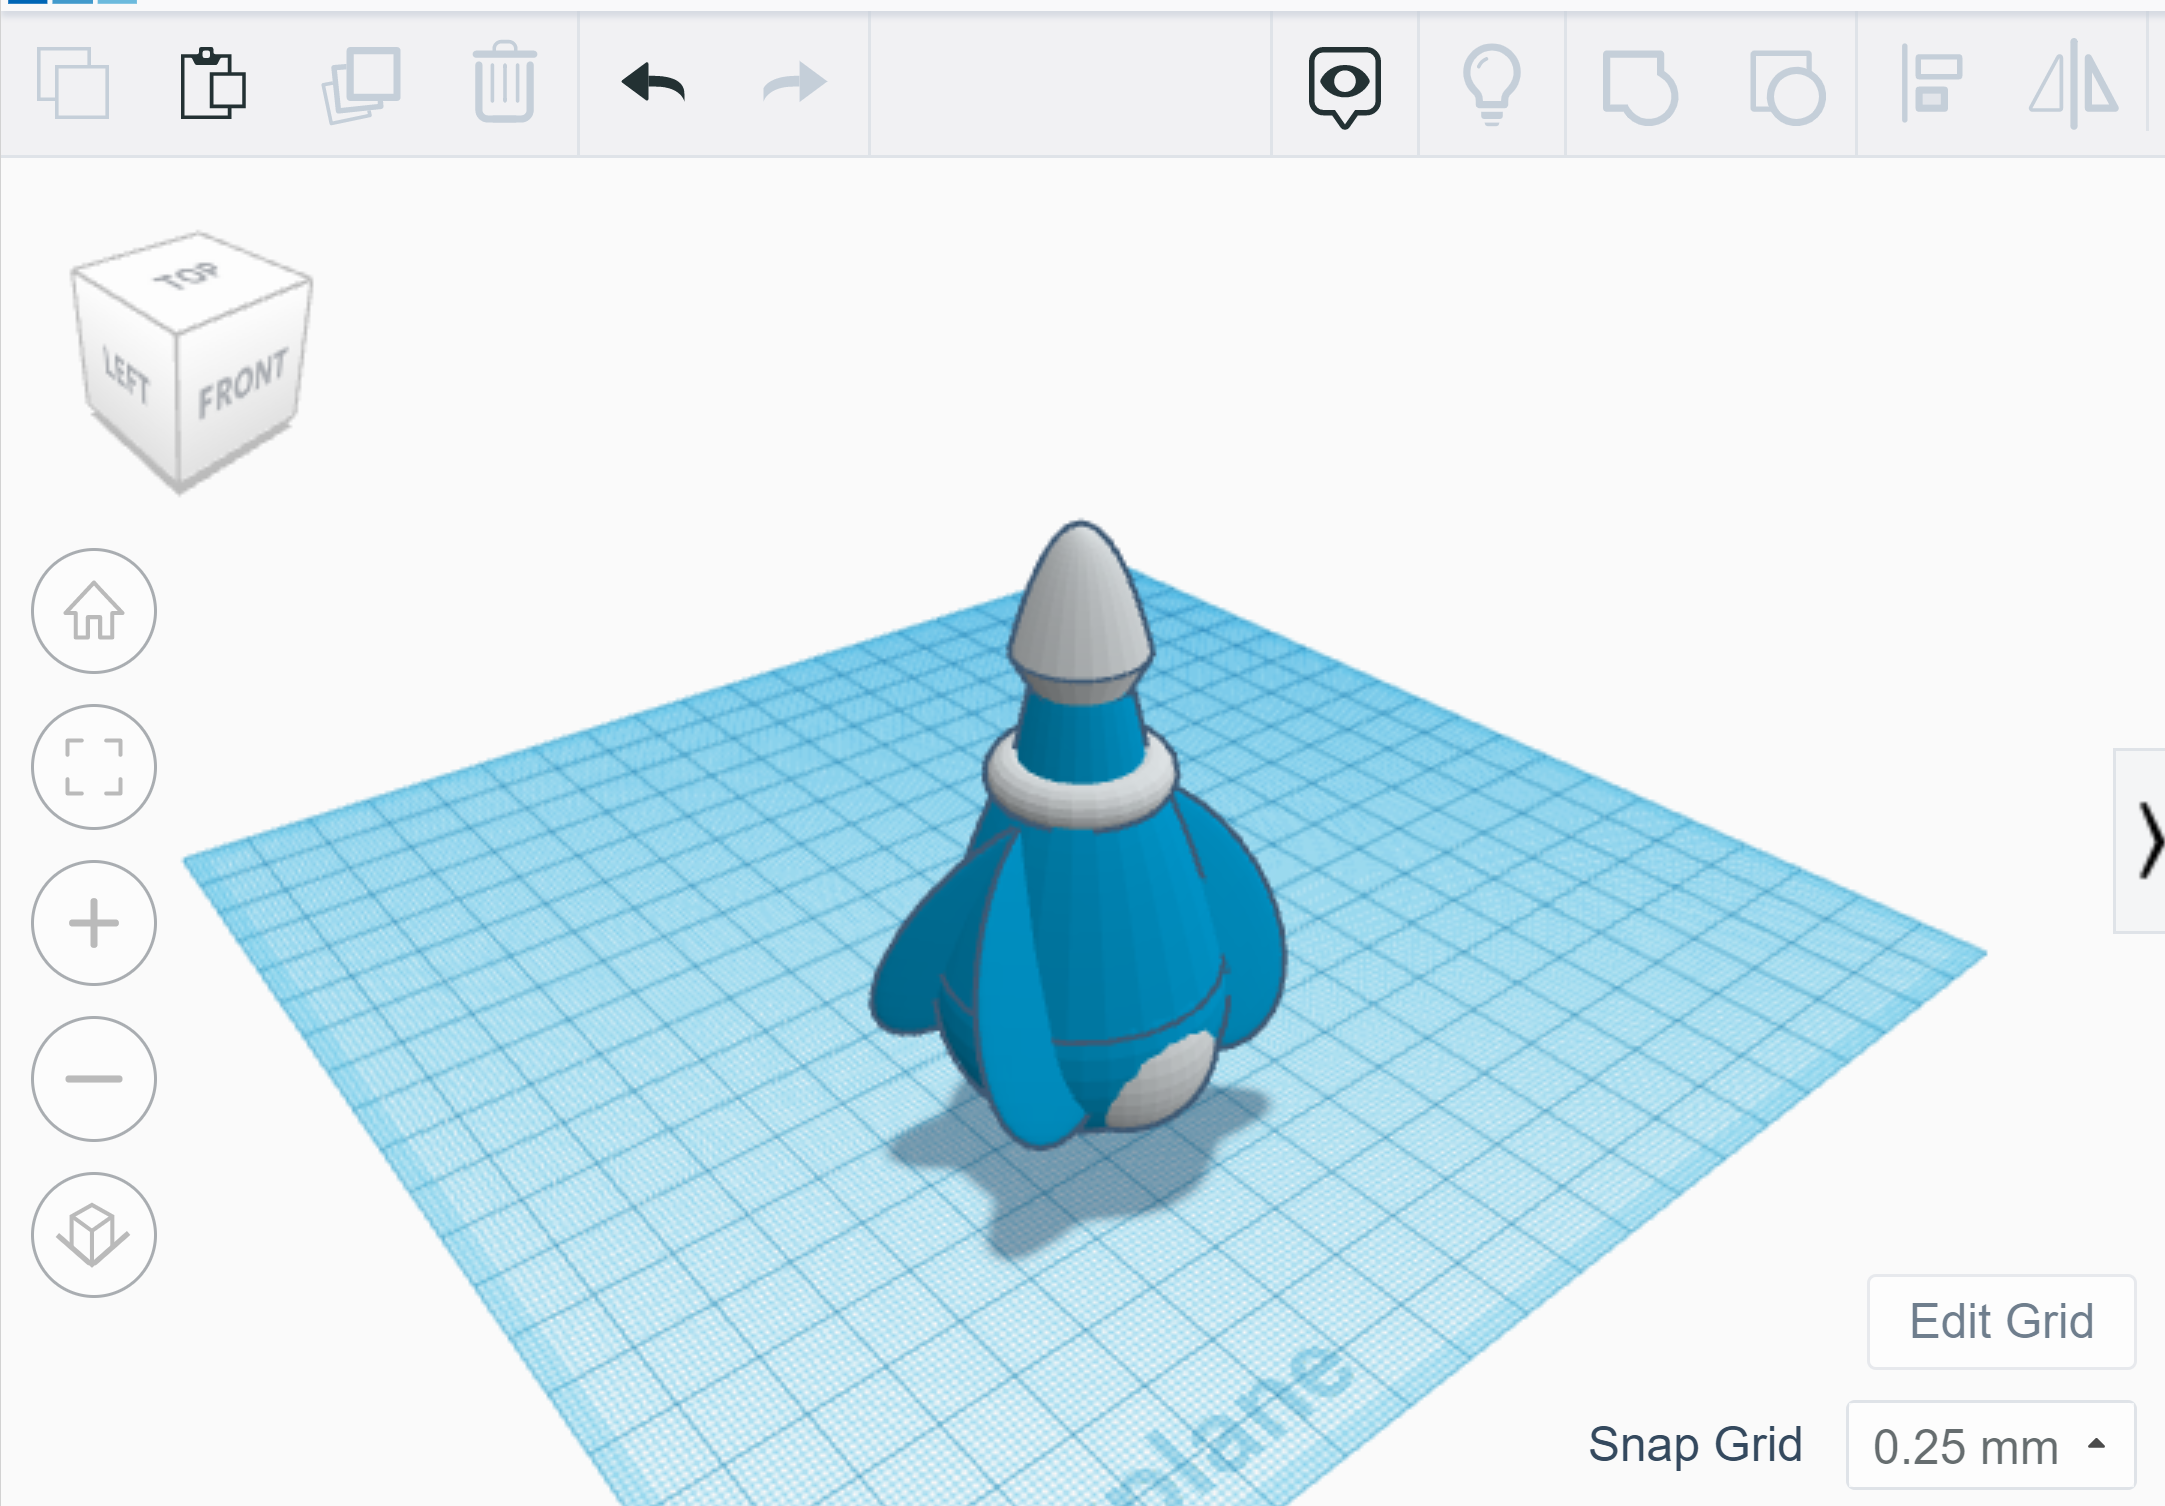
Project Two
Spaceship

Project 1
Project one was not the smoothest process, but after going back a few steps for new attempts it helped me better understand how to operate the Tinkercad tools.
In this project I learned how to duplicate and rotate, align shapes and create doors/holes. I also used several of the same shape as starting points for different parts of the building.
The end result isn’t perfect but I learned the importance of grouping, understanding how each step leads to shaping the design.
Project 2
After working through one project and several basic lessons, I found it easiest for me to skim the instructions to discover my end goal for each step, and create the shape or design in a way I understood it. In other words, rather than following each step word for word, I would use the image and my new knowledge to create the final product. I found that learning the software is more important than following each step because the skills can be transferred to any design and are available for me to create an original project.
That being said, I would like to print my 3D projects to see if they both print effectively, and to understand how well my skills online translate to reality.