Photography Techniques
The Rule of Thirds
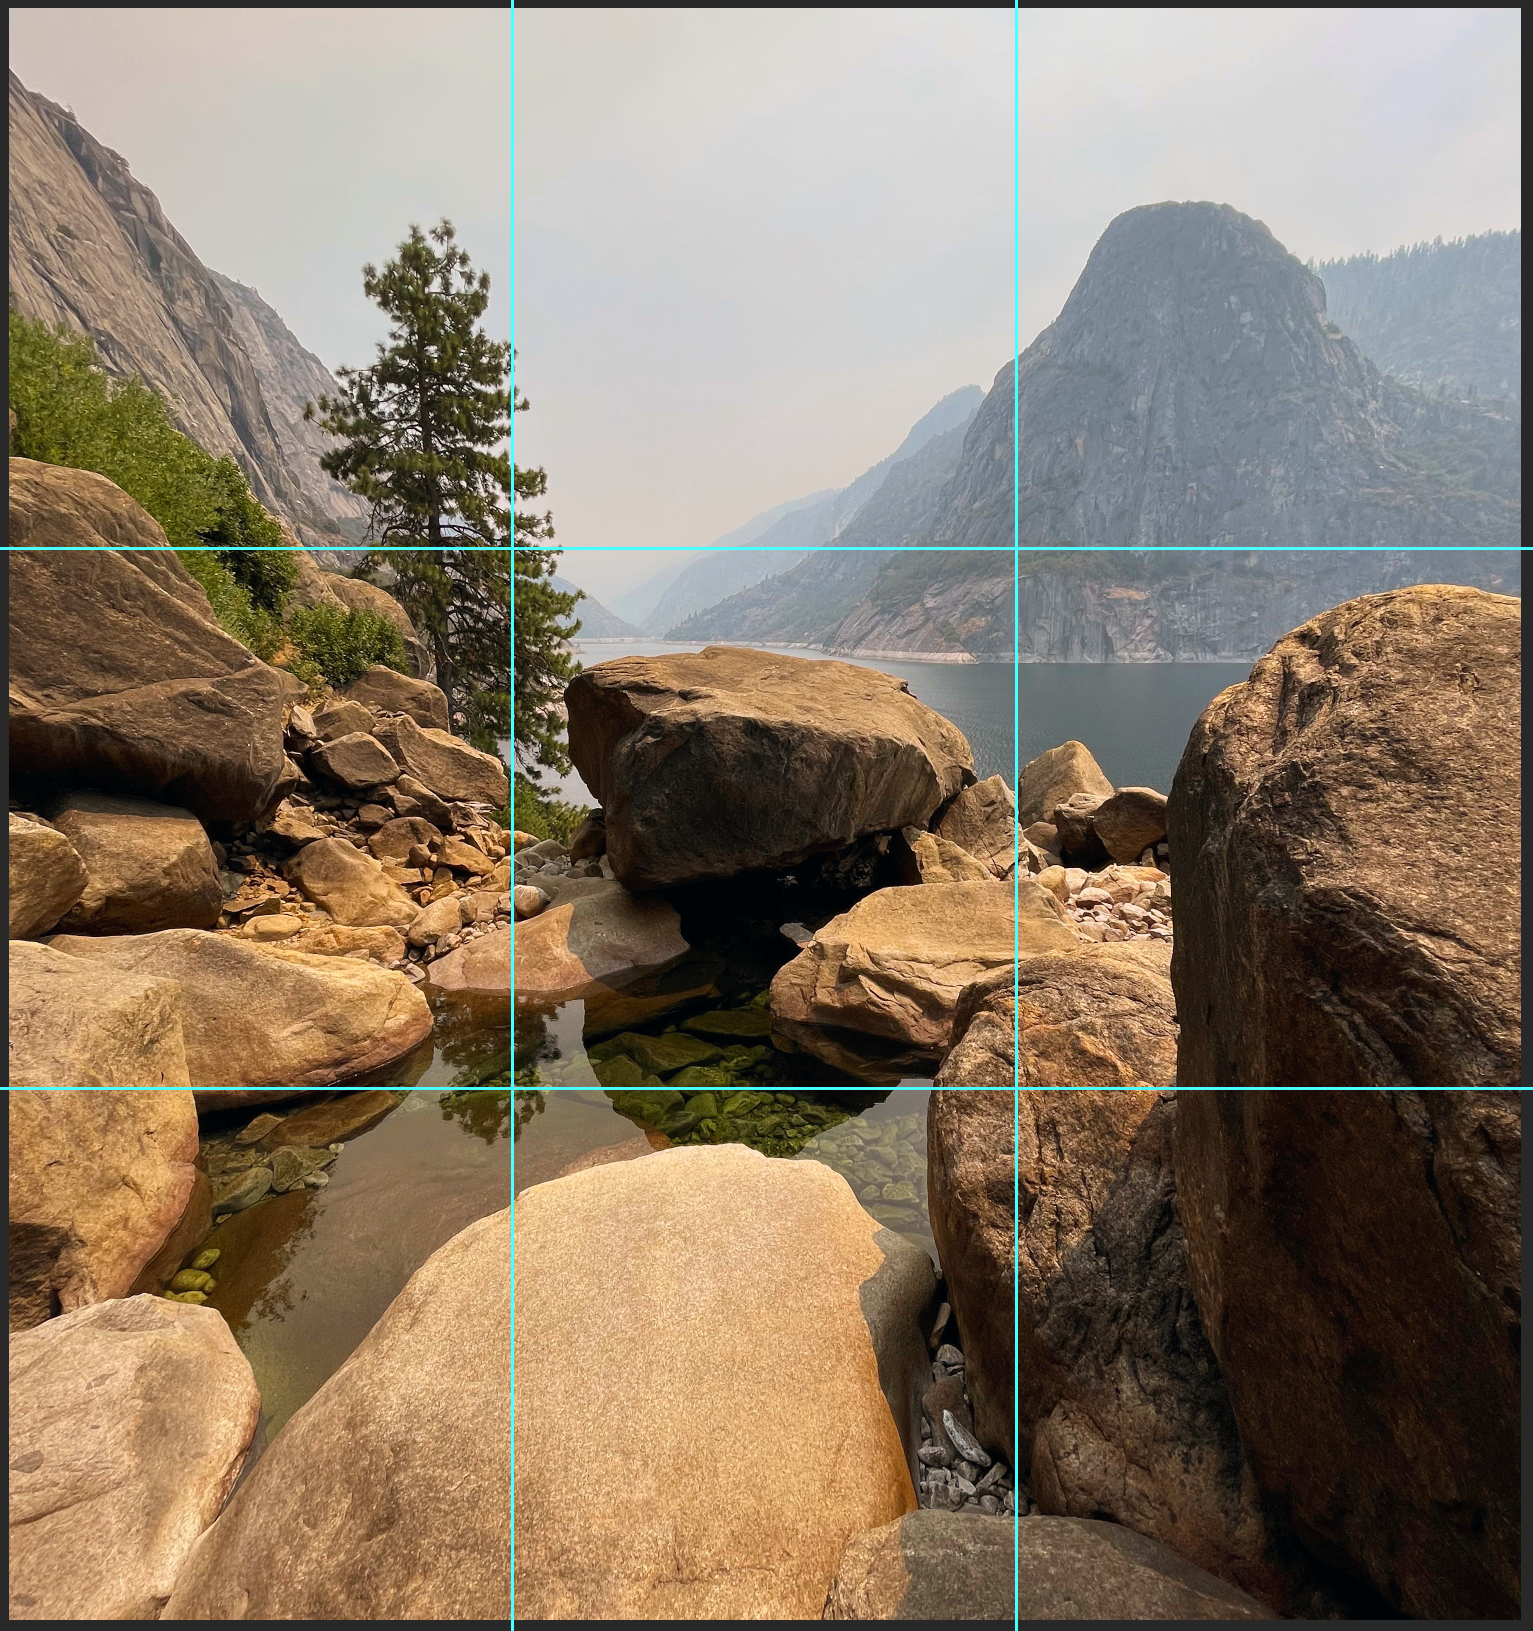
Frame image in a grid of thirds- horizontal and vertical- to create 9 boxes. Main focus(es) of the image should line up along the lines of the thirds in frame, either horizontal or vertical.
This is a commonly used “rule” for any landscape image. It is useful because it helps organize a lot of information for the eye to take in.
To the left, the grid lines show where the photo is divided into thirds. The tree and the mountain each line up with one vertical third. The horizontal thirds are defined bottom to top by the flat rock, the pool of water and lake centered by the boulder, and the sky.

Symmetry
Center the image so each half of the frame is identical.
Symmetry is popular for the way it draws the eye. It is satisfying to take in and looks neat and organized.
The image to the left is not in perfect symmetry but the photo was shot with symmetry in mind. The center of the frame is in line with the center of the book and the book is halfway open and pages dispersed to each side.

Size is Power
Zoom in or get close to take up a most of the frame with a small object.
This aspect of photography allows the artist to practice mindfulness. Creating an image of a small object that appears large in the frame forces the photographer to look closely and observe things they may otherwise overlook.
This can be challenging on an iPhone as getting super close makes it hard to keep the object in focus.

Head Space and Gaze
Leave space above the head of the subject and leave extended space following their gaze.
This strategy allows the viewer to engage with the image by wondering what the subject is looking to. The space beyond their gaze draws the eye across the image, possible imaging what goes past. The head space simply helps to frame the subject in a manner that looks well and keeps all of the desired information within the photo.
I had my subject (my husband, Kaleb) look toward the light source to add some contrast and interesting light/shadow to the image since not much else was going on.

Depth
Focus on the object or subject in the foreground of the frame to create a sense of space.
This is another popular strategy in photography, to capture the beauty of an entire landscape but also keeping the viewer focused on the main subject.
This image uses the focus on the shell with a visible ocean lined horizon extending past it. Know that the shell is so small and seeing so much information in the distance evokes a sense of depth.

Leading Lines
Frame lines so they all lead the eye to the focal point.
In this image, the center crack and edges of the sidewalk, along with the repeating lamp posts and the lighter tread of the grass create lines leading to the center of the Old Capitol building.
Leading lines are useful in keeping the viewer immersed in the image as they draw the eye in and throughout the photo.
Final Note
The strongest of the images above is the final one, of the Old Capitol building. Not only does this photo exemplify leading lines, it also demonstrates the rule of thirds and symmetry. It is made interesting by the contrast between the sky and ground in both color and texture.
Experiments in Photoshop

Removing Items in Photoshop

Photoshop can help clear up a landscape by removing unwanted things in front of or in the background of the view. Here is an example of how I removed the telephone wires from this midwest landscape. I used the clone stamp tool to cover the wires with sky and clouds, then the healing tool to correct any unconvincing or rough spots.

Photoshop allows for inserting new figures or objects to enter the scene. In this example, the coffee and cinnamon roll were made to seem larger by adding a diver into the coffee. This photoshop method can help add absent family members to a family photo or add a new background to the subjects. Additionally, as shown here it can simply be for the creation of intriguing or silly images for your audience.

Adding Items in Photoshop

Editing Exposure &
Changing the Background

Editing the exposure can brighten and intensify the color and allow more information to register. Above, I increased exposure to bring out the orange of the pumpkins and increase the contrast without messing with any other adjustments.
This is example has a dramatic color change and a quick background exchange to provide a peek into what is available with photoshop.
To change the background, I followed these steps:
Select the sky and house.
In a new tab, open an image with a new sky.
Copy the selected area, then pasted it on the new sky image.
With the background layer selected and the selected area outlined, copy. This will copy the sky in the shape needed.
Paste the sky into the original image, over the house.

Editing Exposure
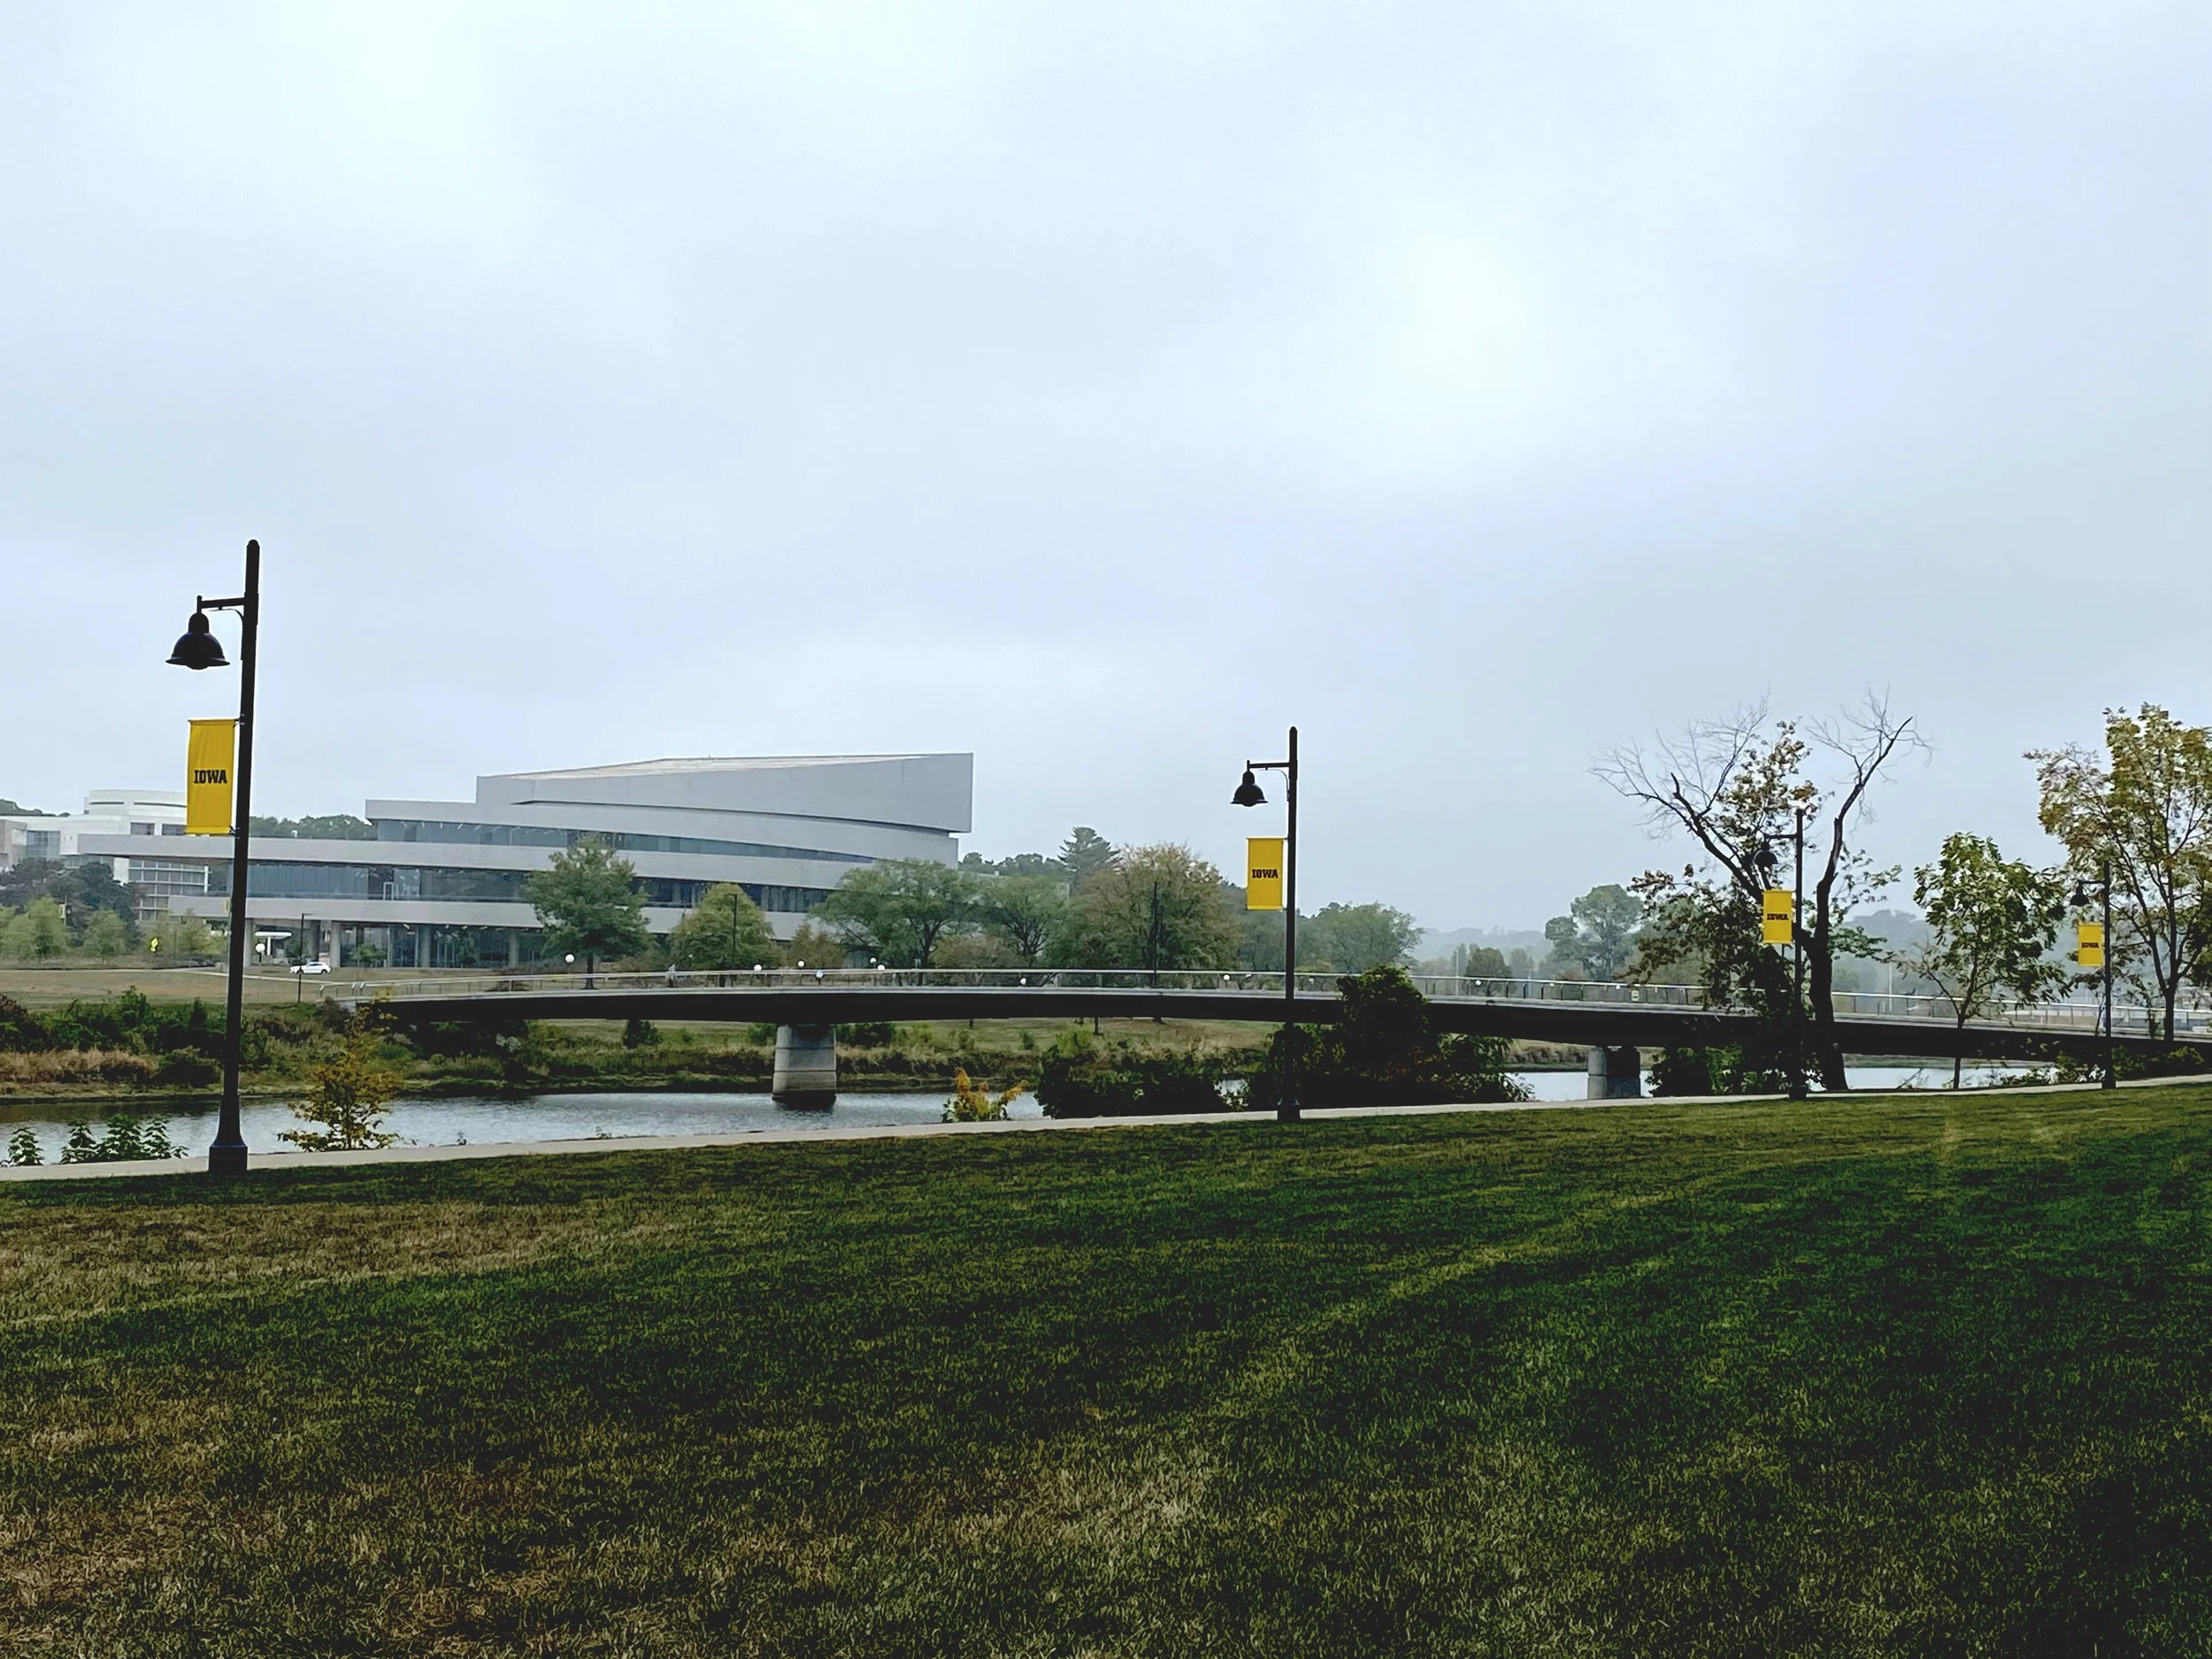
As stated above, editing the exposure can brighten and intensify the color and allow more information to register. The trees and grass in this image particularly stand out after editing as more of the texture appears and the green is emboldened.

Editing Exposure
& Altering Tilt of the Horizon

One final example of the results after editing exposure. The main thing I appreciated in this change was the more defined textures being seen- in the cables, rock and figures.
The other small difference between the two is the photo has been straightened to allow the horizon to be perfectly horizontal. This allows the image to more accurately depict the steepness of the bolder and stabilizes the scene.
Classroom Applications for Photography & Photoshop
Photography would be useful as a lesson for middle and high school students.
In some schools, most students have smart phones that have nice cameras, making access to materials easy. Students are already using their devices to take and post images. Learning techniques for framing an image and editing aesthetics is highly applicable.
I outlined examples of photoshop above, but there are free options like Pixlir for anywhere PS isn’t an option.
One way that this lesson could be paired with another high school class would be in journalism or newspaper. This art lesson would provide students with tools to shoot, edit, and ultimately create quality images for articles.
This is also a good tool for students to take with them post-secondary school. If they work for a small business, university organizations or starting their own business, they can take their photography and software editing knowledge to help with simple marketing on social media or websites.